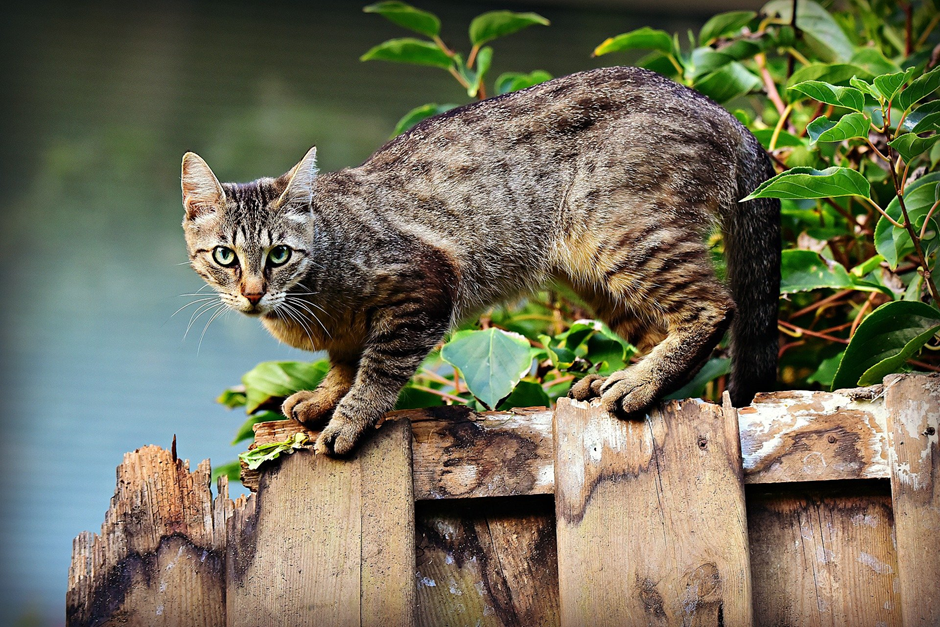
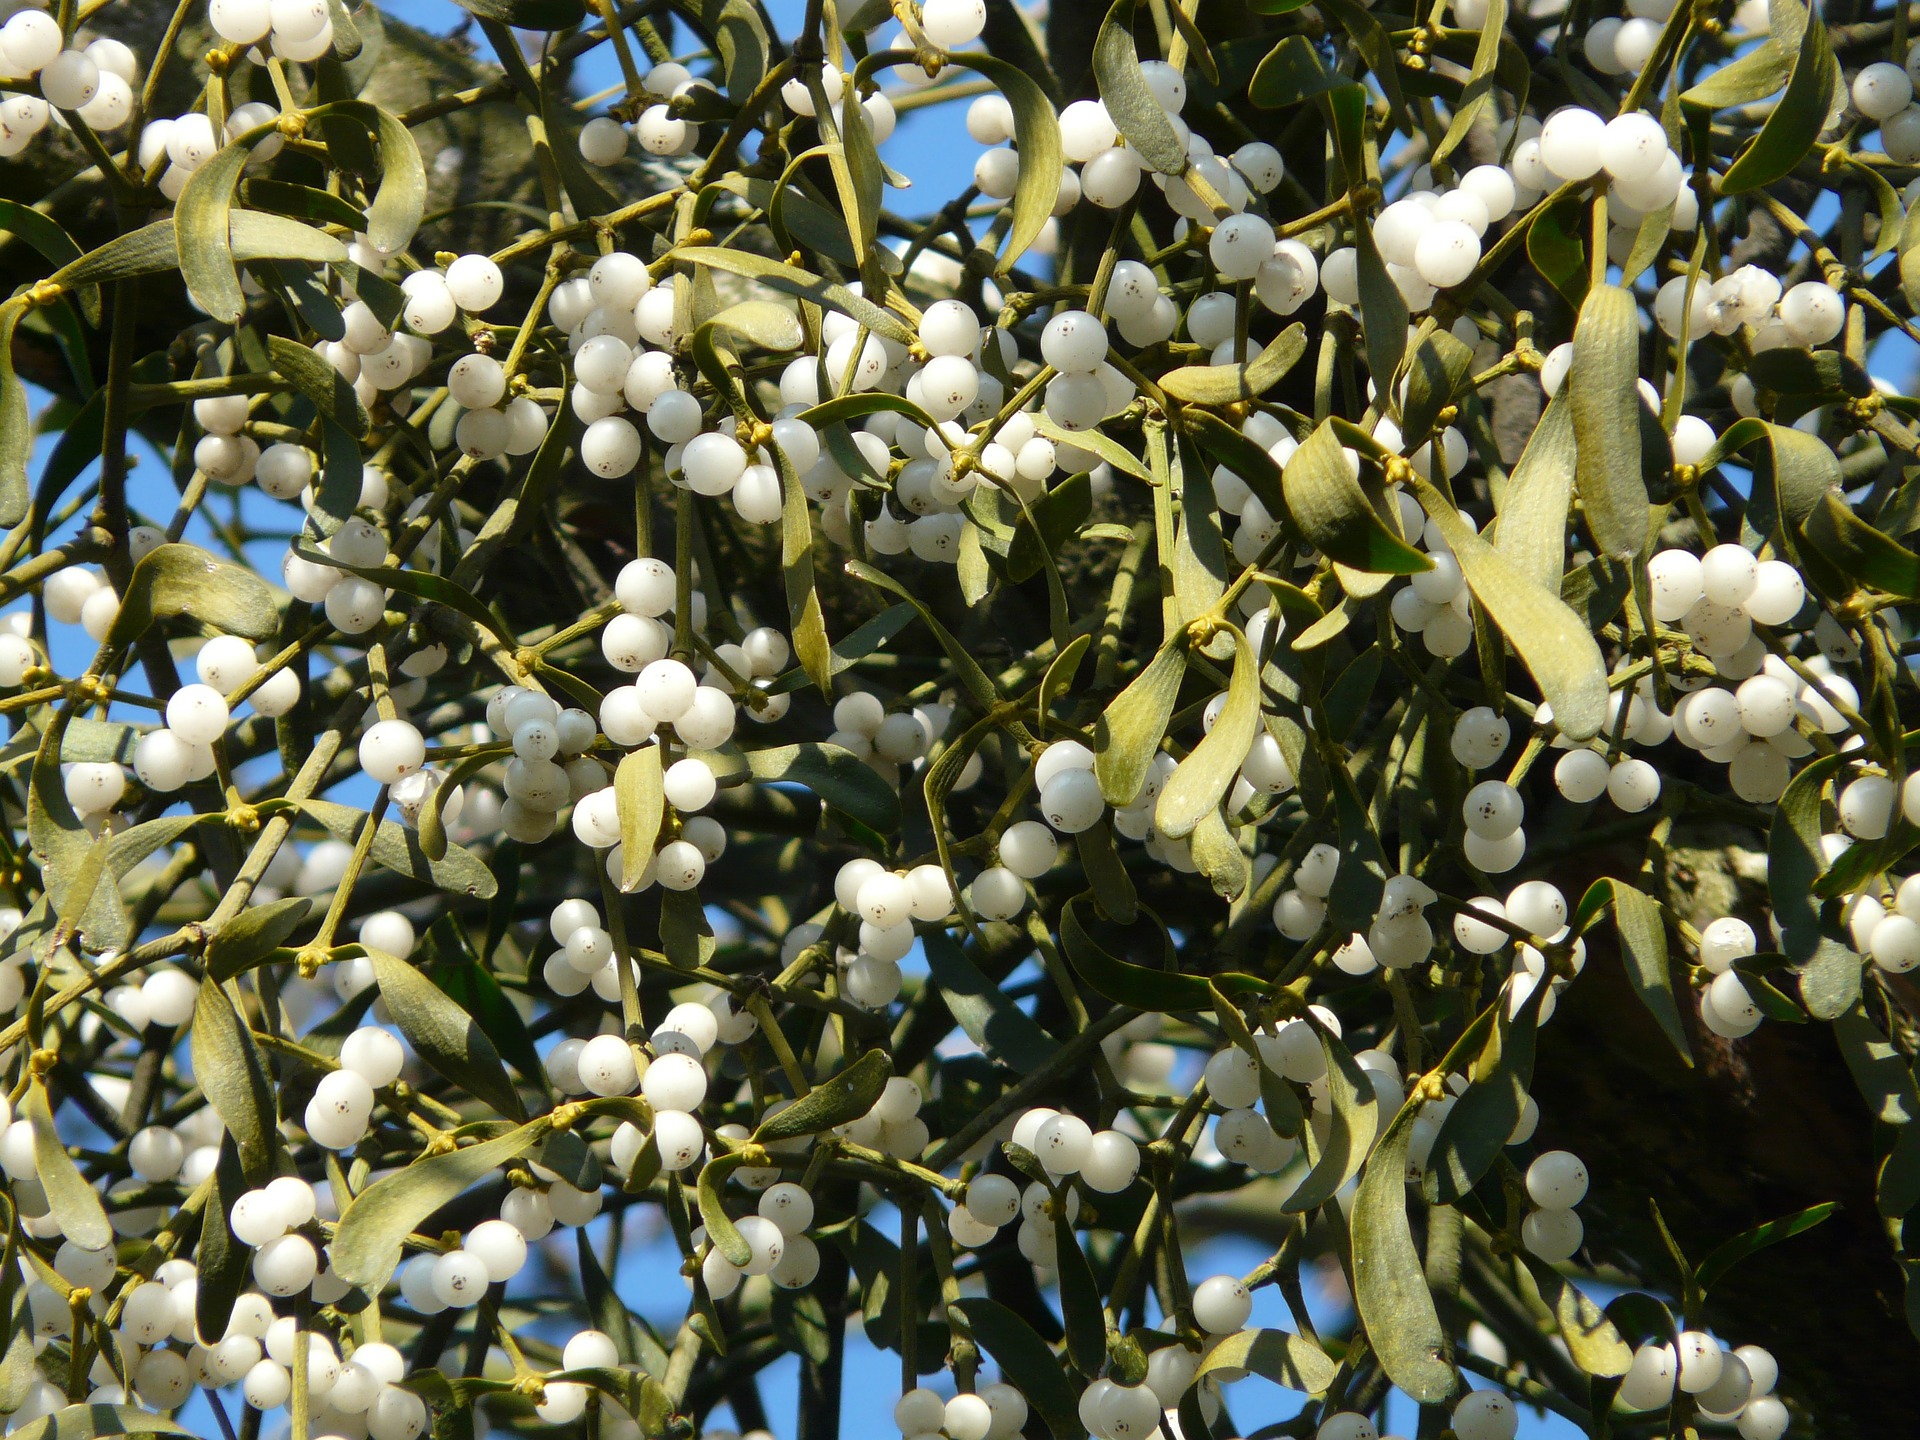
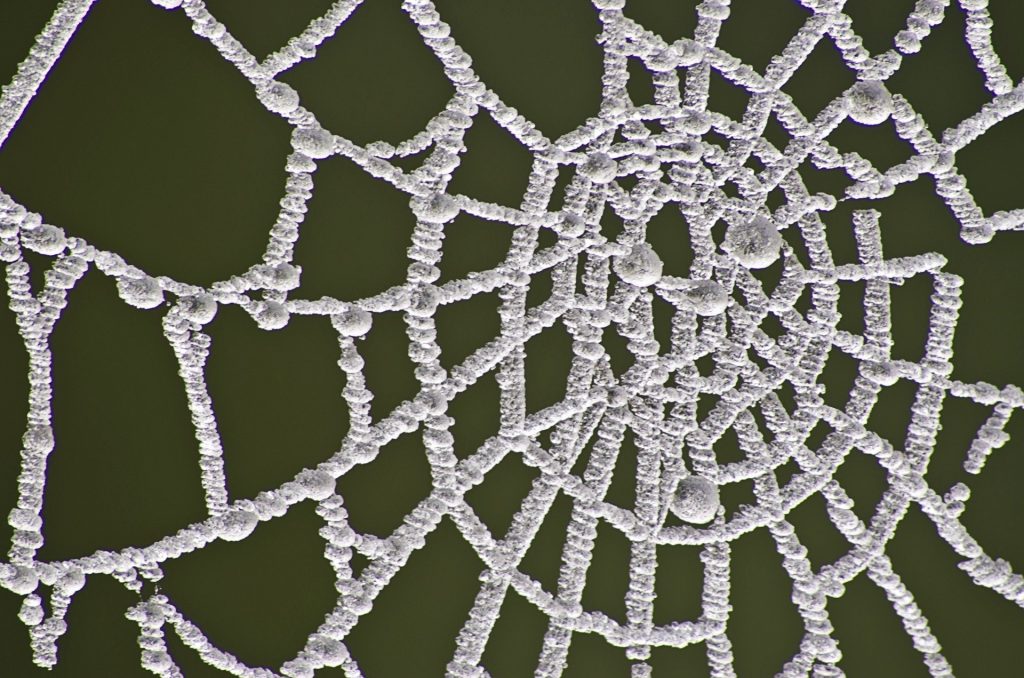
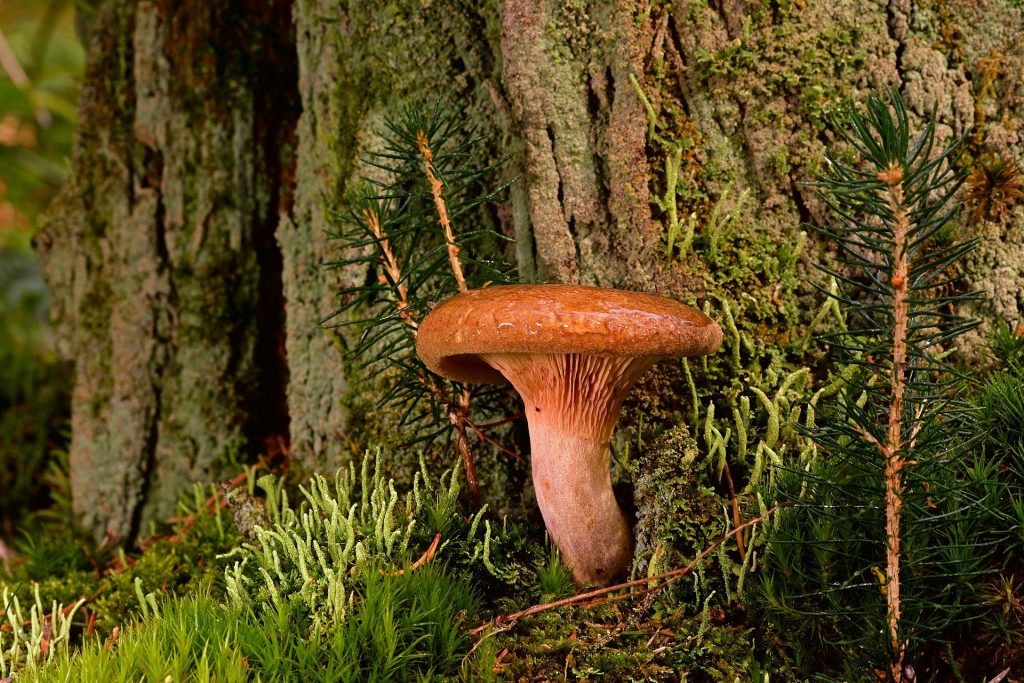
Can you spot any of the things on the list below?
In Iceland, icicles are known as Grýla’s candles. Grýla is an ugly troll, in an Icelandic legend, who takes naughty children back to her cave and puts them in her cooking pot! Grýla loves Christmas because children are a bit naughtier than normal as they get so excited.
In volcanic caves, lava can slowly drip through the roof of a cave to make long lumpy tubes, which look like icicles, they are called lava stalagmites. As Grýla is a cold and miserable character, her candles are made of ice, not lava. So in Iceland, they call icicles the ‘candles of Grýla’.

According to a legend on a chilly night in Bethlehem thousands of years ago, a brown bird fanned the flames of a fire to keep the baby Jesus warm. Burnt by the fire, the breast of the bird turned red forever.
If you can’t find a robin, look out for something as red as a jolly robin’s breast!

According to tradition, if you leave a leaf of ivy floating on water on New Year’s Eve and do not touch it for the next twelve dates it will tell your future. If it is still fresh, then you will have a good year ahead. If black spots appear on it, then sadness awaits you.
Another old belief is that you shouldn’t offer ivy as a gift or bring ivy into your house unless it’s Christmas as it might bring you bad luck! Even during the Christmas period, you should only bring ivy into your house with some holly, which is thought to stop any bad influence that the ivy may have.

According to a traditional tale, every year during Christmas, a giant cat roams the snowy countryside of Iceland, eating farmers who have not been working hard enough in the fields. However, those farmers who have worked hard are rewarded with a new set of clothes.
It’s become a custom in Iceland to buy new clothes for Christmas, which also protects the wearers from being eaten by the giant cat!
According to a Norwegian legend, Balder, the son of the goddess Frigga, was killed by an arrow made of mistletoe by an evil spirit called Loki. His mother Frigga leaned over him and cried tears that turned into white berries. When she placed these berries onto Balder’s wounds, he was healed and brought back to life. Frigga blessed the mistletoe plant, promising a kiss to anyone who passes underneath it ever since.
Spider webs are considered to be lucky in Ukrainian culture. According to a Ukrainian folktale, there was once a poor widow who did not have enough money to buy ornaments and decorate a Christmas tree for her children. The spiders in the house felt sorry for her and spent a whole night decorating the tree with their beautiful webs. When the children woke up on Christmas morning, the most amazing present was awaiting them.
Children in Spain find a hollow log every Christmas and decorate it with sticks for legs, a smile and a red hat. Between 8 December and Christmas Eve they ‘feed’ the hole of the log with treats! On Christmas Eve, they beat the log with sticks to open it up and reveal the candy. It is then thrown in the fire for warmth.

The Yule log was a big piece of wood, sometimes a tree stump or root that was brought home on Christmas Eve and was thrown onto the fire. The log had to be lit using a leftover piece of last year’s Yule log that had spent the last year under the owner’s bed; keeping the house safe from fires and lightning. If the log didn’t light the first time it was a sure sign of future misfortune for the family.
It was traditional during Christmas Eve’s dinner to keep the log burning, although it couldn’t be tended whilst there was still food on the table. As it slowly burnt, the family would share ghost stories.

According to Norwegian folklore, witches appear on the night skies making mischief on Christmas Eve. To protect themselves from trouble, families have to hide their brooms so the witches won’t be able to find them.
Not everyone has turkey and mince pies for Christmas dinner. In northern parts of South Africa, fat roundworms called mopane are considered a lovely treat. They’re not really worms but are caterpillars of the emperor moth. The caterpillars are fried before being eaten and are said to give all who eat them good luck in the coming year.
People all around the world have different traditions at Christmas, and like eating different types of food.
Mini Challenge
Why not turn your scavenger hunt into a family selfie competition? Maybe you could use your photographs for your Christmas cards!
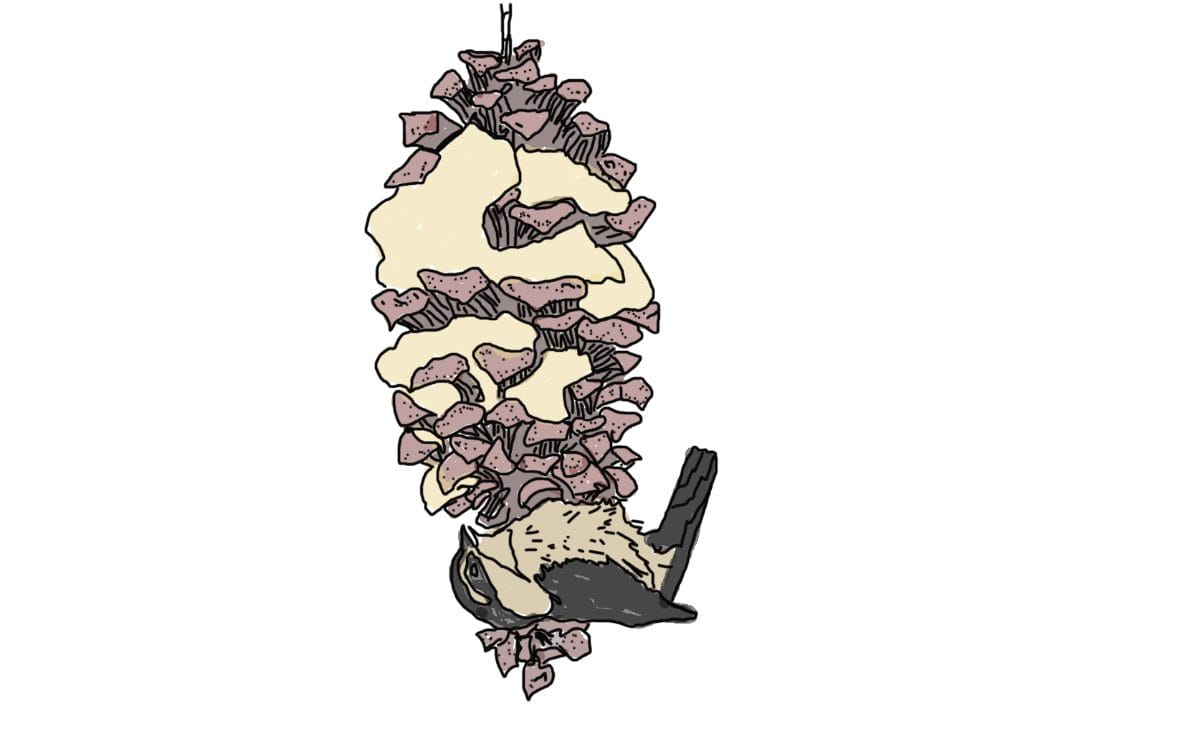
If you have a tree or bush outside your window, decorate it with different kinds of bird feeders. You can then watch all the birds that come to visit it.
Tips!
Allow popped corn to sit out for a day or two so it becomes less brittle, making it easier to string to your garland.
Choose the fattest popped corn for stringing and push the needle through the largest part of it.
Work on a small bit of the garland at a time so you’re not trying to push the popcorn to the end of a very long string. About three feet of garland at a time is a good length.
Choose a tree in a spot you know your local birds will visit. If you haven’t hung bird feeders before, expect it to take a few days for the birds to take notice.
To find out who has visited, use the RSPB bird identifier.
Create decorations from natural materials
Make a star ornament out of twigs
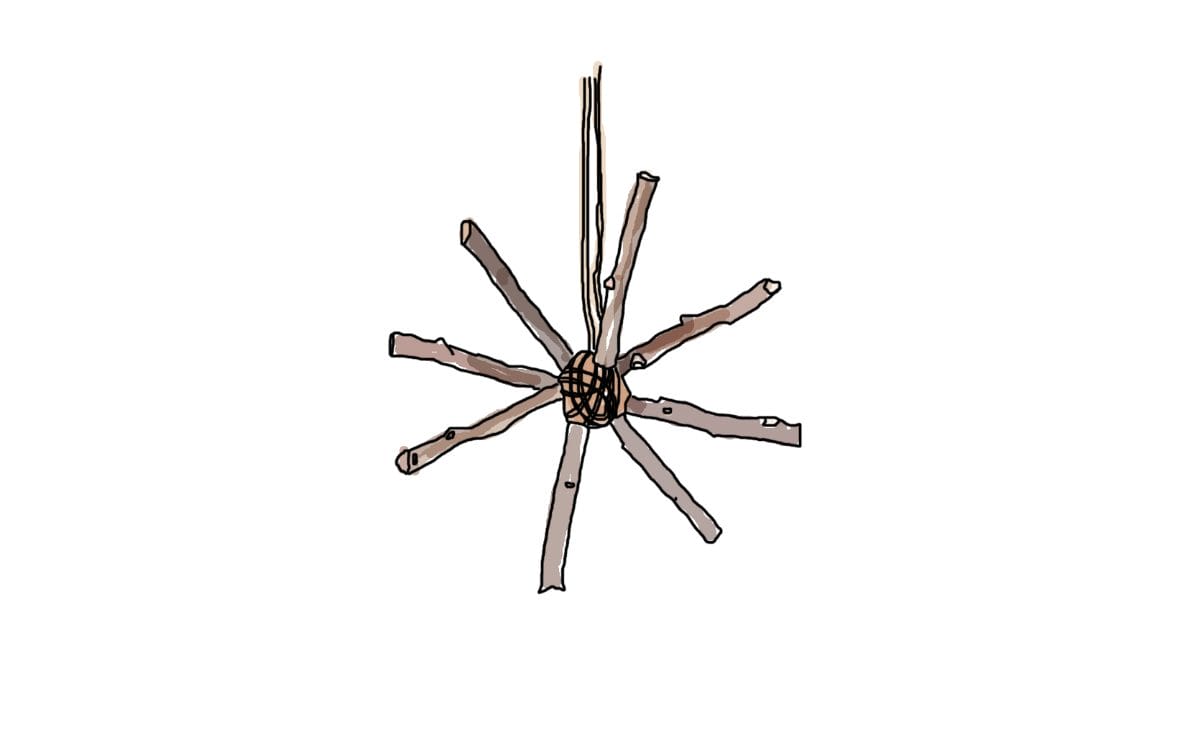
Instructions
Collect some twigs and let them dry for 2 days.
Ask a grown-up to help you trim the twigs so that you have four that are the same length. You can use garden secateurs which also helps to remove any pointy ends.
Use a lump of blu tack to arrange the twigs into a star shape and hold it in place. Thread yarn between the sticks where they join at the centre, make sure it’s good and tight.
Keep wrapping yarn around the centre until the star is firmly in place!
Tie a piece of string on one end of a twig in a loop for hanging. You’re done!
You can decorate your sticks by wrapping different colours of yarn around them!
Make a hanging Christmas tree out of twigs and twine
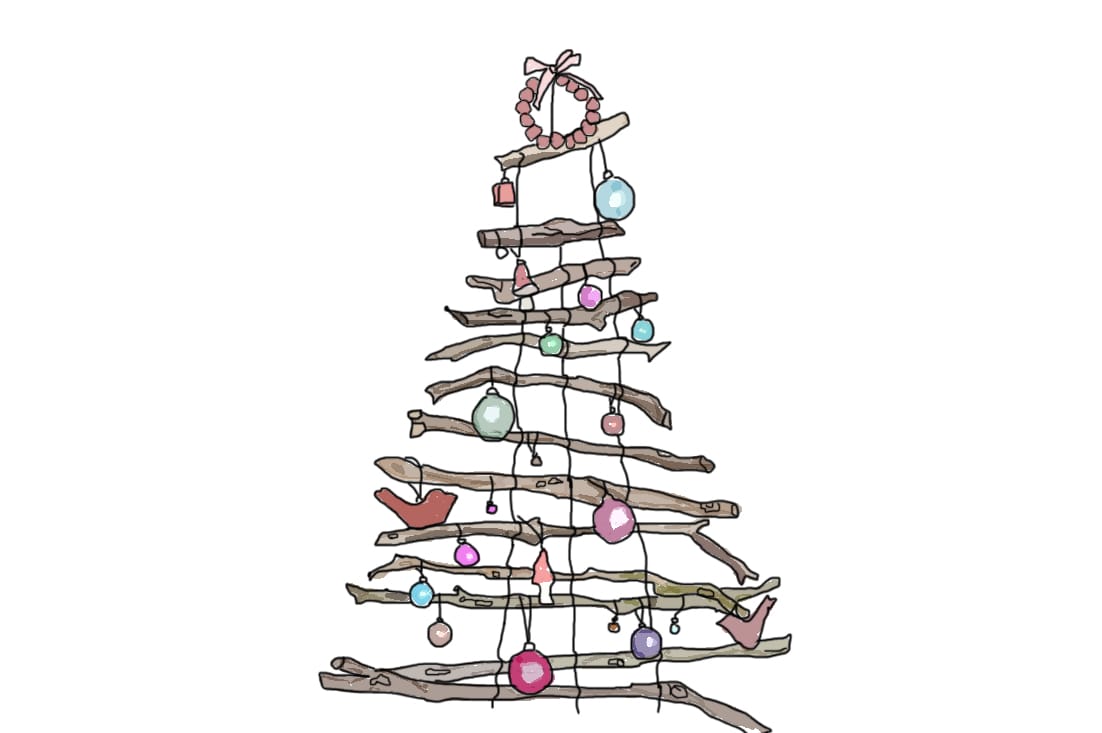
Gather up branches and twigs of different sizes. Aim for about eleven different lengths as this will create a good-sized tree. Leave them to dry out.
When they are dry, line them up with the longest at the bottom and the shortest at the top to create a tree shape. Ask a grown-up to help you cut some of the branches to size if needed.
Measure out your twine from the top to bottom stick, leaving some extra to loop around each stick. You’ll need three long strands. Start at the top and loop twice around the top stick and then continue down each stick, looping the twine around each stick twice, until you reach the bottom stick. Now repeat for the other two strands but keep remembering to check that your sticks are evenly spaced.
Once complete, tie a loop of twine at the centre of the top branch and hang your tree from a strong hook.
Start adding decorations to the sticks! Pine cones, dried berries, small baubles and lights can be wrapped around the sticks to add a real festive feel to your tree.
Make a reindeer out of twigs and pinecones
Instructions
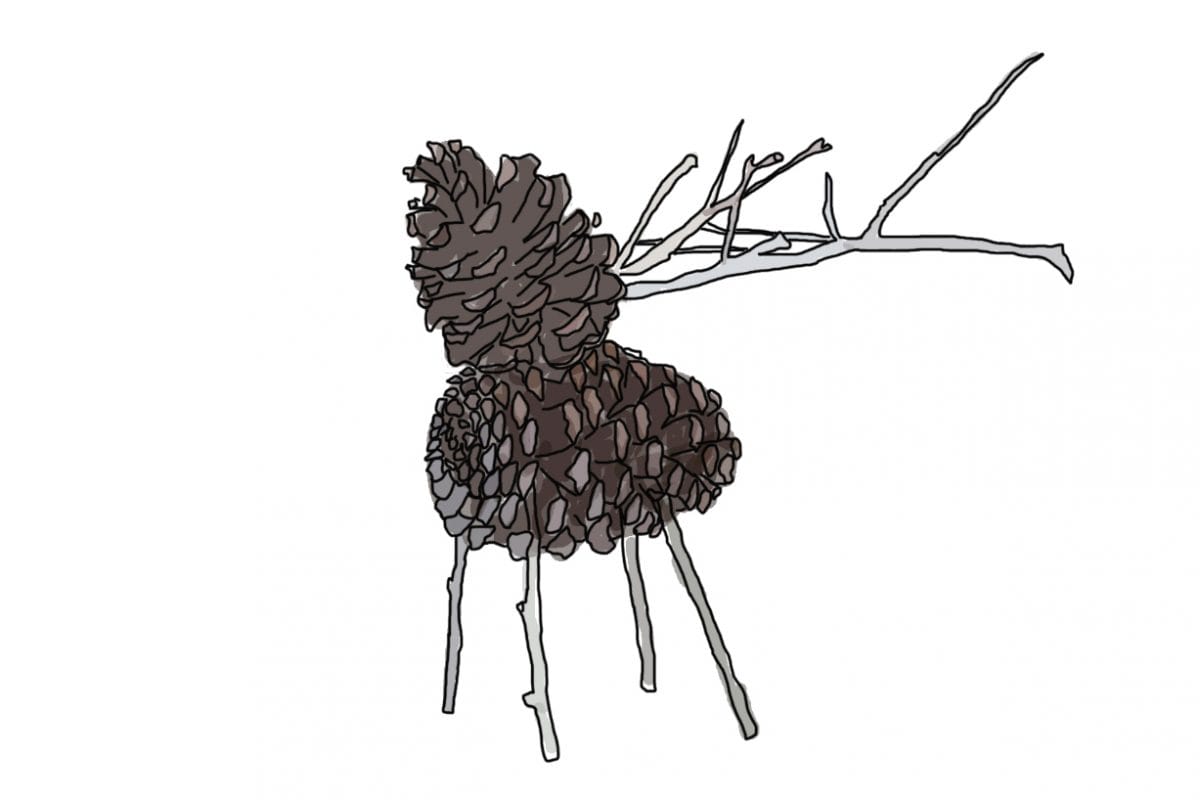
Collect twigs and pinecones to form the body, head, legs and antlers of your reindeer.
You might want the head to be smaller than the body so lookout for a bigger and a smaller pinecone. Also, make sure the sticks that will form the legs are straight and thick enough.
Leave your materials to dry out for about 2 days.
Use hot-glue to attach the different parts together (remember to ask a grown-up for help with this). For the reindeer head, the pine cone goes one way with the smaller end being the nose, and for the reindeer body, the pine cone goes the other way with the larger end forming the chest.
Find the best spot in both pine cones, where you can push them together and get a good hold. Once you have a good spot, pull them apart, put on glue and hold in place again until the glue has set.
For the legs, before you glue, find just the right spots. Cut the leg branches about 4” to 4 1/2” long and glue.
For the antlers, pick 2 branches, and fit them to the top of the larger end of a pine cone, pushing into the pine cone for a good fit. Glue antlers into the pine cone. Make sure the antlers do not make the deer top-heavy, if the deer falls over, the antlers are too large and/or too heavy!
Done…now maybe add a red pom pom nose, tie on a jingle bell or ribbon or any other small ornament! You can also paint them with silver or gold spray paint.
Create decorations from recycled materials
Turn any can into a sparkling lamp
Instructions
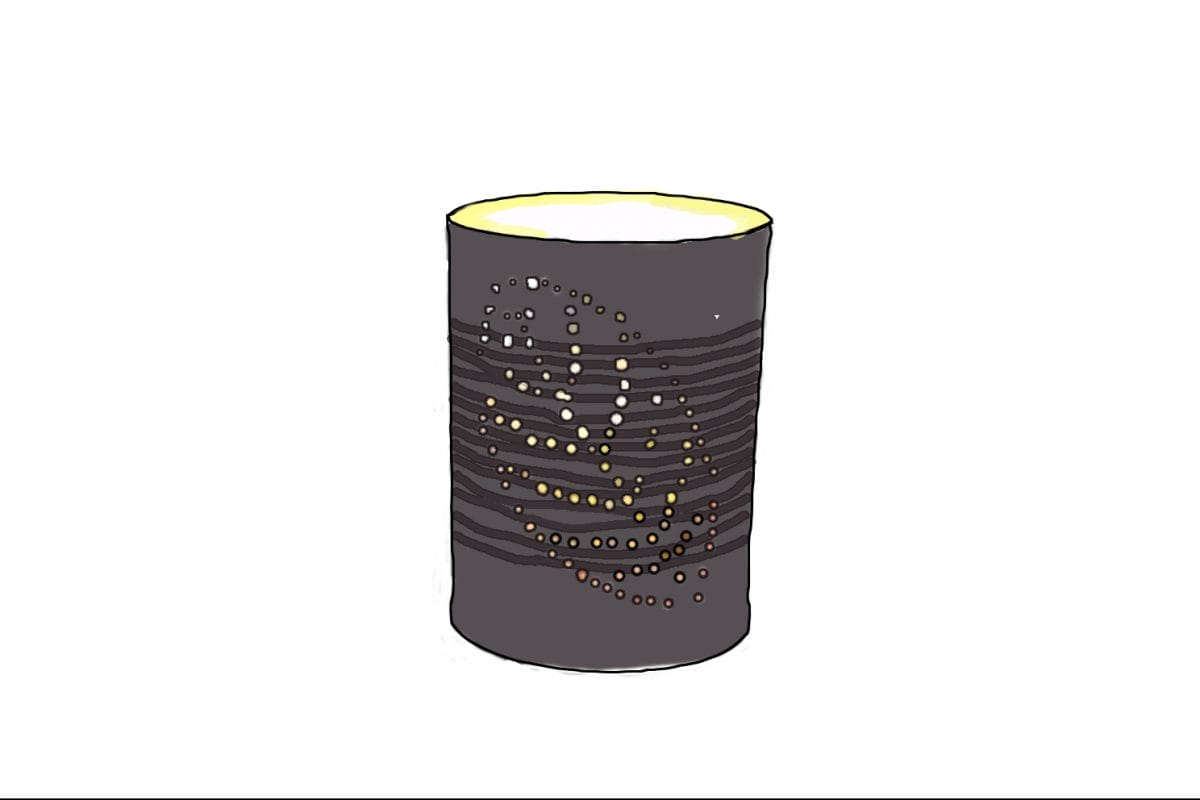
Remove labels and clean your tin can thoroughly. Fill the can with water and freeze overnight until solid. The ice stabilises the can and will prevent it from bending when you punch holes in it later.
Decide on a design for your punched tin decorations. You can draw a pattern out before on a piece of graph paper and tape it to the can as a guide.
With the help of a grown-up, position a sharp, narrow nail above each mark on your pattern and gently tap it 3-4 times with the hammer until just the point has punched the tin can. Repeat for each mark until you have completed your pattern.
Rinse the can under a hot tap until the ice blocks pop out and allow the can to dry.
If you want to add some colour to your new punched-tin lantern, you can create a variety of fun, shiny designs by simply using colourful permanent markers!
Drop-in some tea lights and enjoy the fun, flickering patterns cast by your new handmade lantern!
Tip!
Be sure to place the lanterns on a fire-safe surface as the candles can get hot!
Make a sock snowman
Instructions
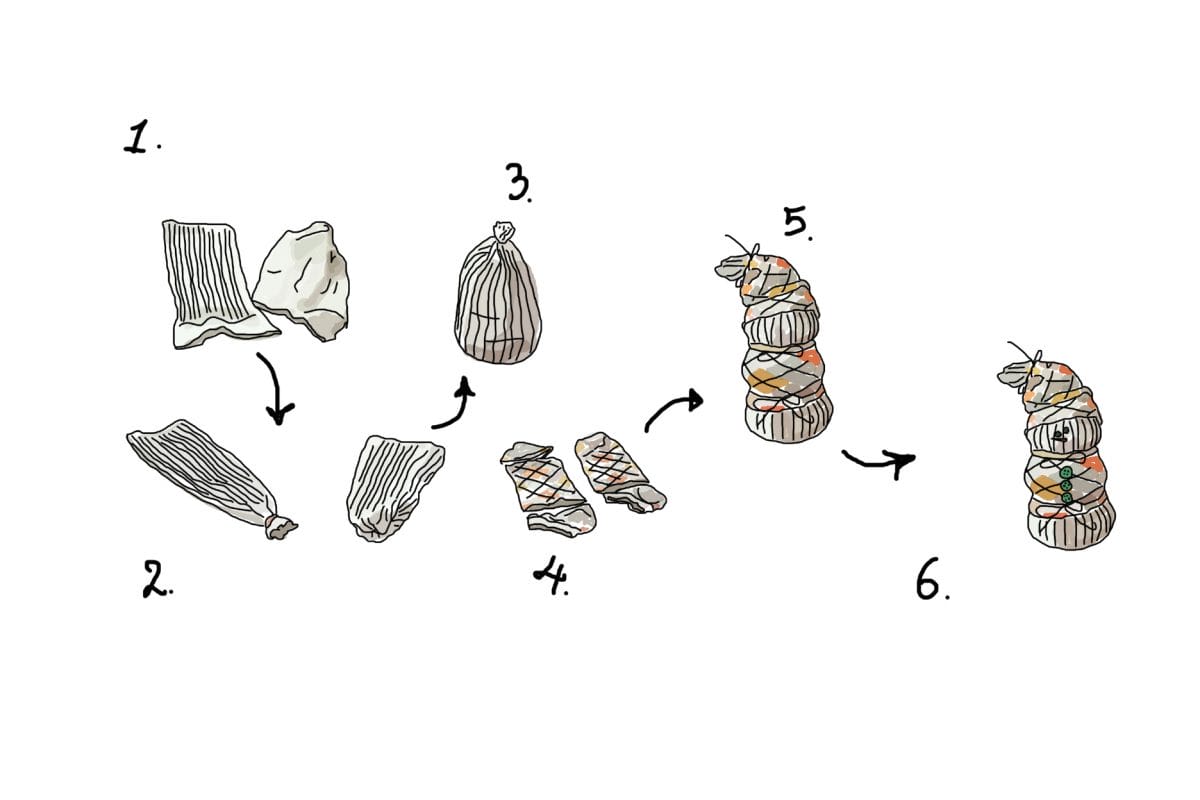
- Cut the foot part off a white sock and keep the tube part.
- Wrap a rubber band around the bottom of the tube part of your sock. Make sure it is wrapped tightly. Then turn it inside out so the rubber band is on the inside.
- Fill the sock with rice. Be sure to push the rice down as you go. This will stretch the sock a bit and make it so you get a nice plump snowman in the end. Wrap another rubber band around the top.
- Find a pair of ankle socks. Cut off the toe and heel of one of the socks. Cut off the heel of the other sock.
- Take the sock without the toe and the heel and put it over your rice filled sock. This becomes the sweater. Tie a piece of ribbon or twine around the bottom and top of the sweater. Tie some twine on the top of the other sock that has the toe and add as the hat.
- Now create the face e.g. buttons for eyes, nose etc. You can sew them on or use hot glue.
Tips!
Use socks that are worn or have holes in them or use odd socks!
In step 2, you could sew the sock instead of using a rubber band.
Beans work too, don’t limit yourself just to rice!
You can add mashed up potpourri to the inside so it smells good too!
How to reuse or recycle your Christmas tree
- Build a den for the tooth fairy with the old tree branches and wood slices.
- Plant the tree trunk in a hole and make some feeders for the birds to hang on the tree.
- Fill a saucepan with a bit of water and spices like cinnamon sticks or pine needles from your Christmas tree. As the mixture heats, it will fill your home with a lovely smell – that will remind you of Christmas.
- If you have a tree with its roots still attached, then replanting your Christmas tree is a great way to reduce your carbon footprint and help efforts to plant more trees. But if replanting is not an option, make sure to check what collection and recycling services are available where you live. Alternatively, if you have a compost bin or heap, then you could break up your tree and add it to the compost.
Here are some Christmas decorations from the museum’s collection to inspire your creations
Christmas tree or window decoration, made of straw, in the shape of a six-pointed star, which is formed by two triangles. There is a centre decoration of straw rays; tied with red wool.

One of two sold as tree decorations. The body, head and legs are made from a group of threads which hold the second group of shorter threads, forming the arms, in place. The head is covered with brown textile which has the features drawn on to it and black thread attached at the back for hair.
