


We work across a range of materials and specimen types, with treatments ranging from gentle dry cleaning, stabilisation of any loose or vulnerable parts of specimens or, where needed, undertaking more interventive treatments. Every decision is informed by the condition of the object, and each proposed treatment must be carefully considered and justified before a specimen is treated.
The bird nest project
One of the most thought-provoking and rewarding projects we have undertaken as a team has been the conservation of several birds’ nests, including hummingbird, redwing and song thrush nests. The work we have done ensures their long-term stability when they are displayed in the new gallery.
Fragility and vibration
Made from loosely interwoven twigs and grasses, these nests are, by their very nature, fragmentary and vulnerable. We wanted to ensure that the nests were stable for handling and resilient to external forces such as vibration during display.
Although it may not be immediately obvious, vibration within the museum due to the heavy traffic, construction work and even footsteps, affects specimens and objects on display. These vibrations can produce forces strong enough to cause direct damage to weak or fragile items on display.
We decided to support the nests by producing an external cup or cradle that would mimic the nest itself.
We had two main criteria we wanted to meet with this:
- The support had to be strong and robust to minimise as much fragmentation of the nest as possible.
- The support would not interfere aesthetically with the nest architecture. We still wanted the nest to be as visible as possible, and we did not want to draw away any attention away from the nest itself. The external support had to be as discreet as possible.
Conservation Manager Misa experimented with Japanese tissue to create a supportive cup like structure that would cradle the nest externally. Japanese tissue is a conservation-grade paper widely used because of its properties. It is made from the fibres from the inner bark of Kozo, Gampi or Mitsumata trees and shrubs found in Japan.
The natural strength and length of these fibres, alongside the manufacturing process, produces paper that is strong and flexible. These qualities made Japanese tissue an ideal choice for this project. As an organic material itself, it is also preferable when treating organic objects such as birds’ nests, as it is more materially and visually sympathetic.
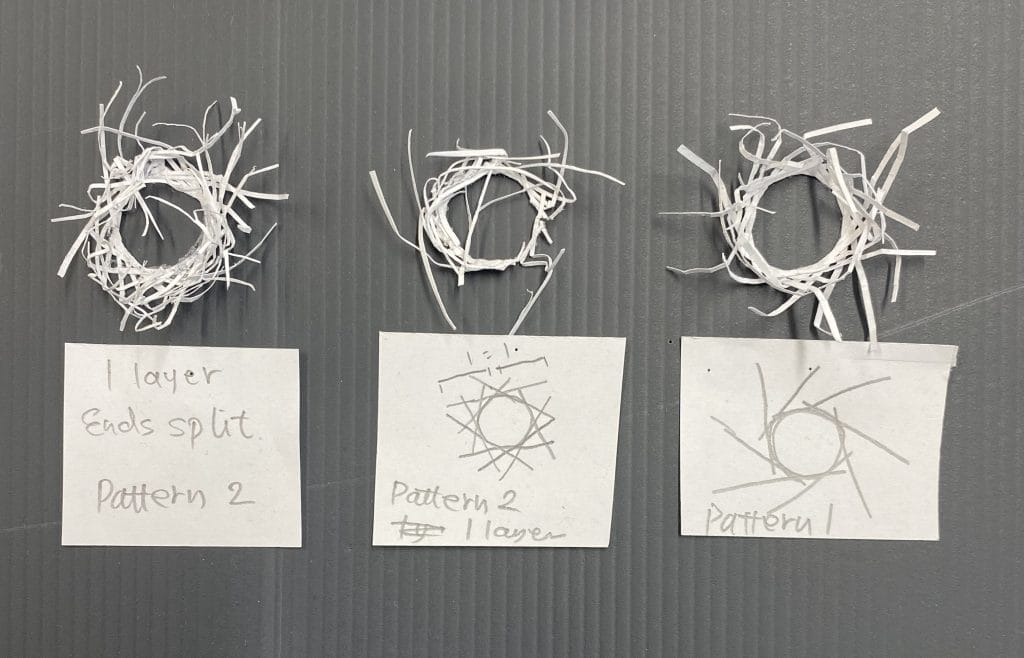
Conservation manager Misa’s initial tissue creations
Making the twigs
Misa found that tinting the Japanese tissue, using watercolours or acrylics, to a colour sympathetic to the nests helped it to blend visually.
Laminating the tissue, by sticking a few sheets together, also increased its strength. Once dry, the tissue could be cut or pulled apart into small strips simulating the twigs. These could then be wrapped around each other or adhered together to from a cup structure that mimicked the nest itself and with the nest placed inside ensuring its stability.
This cuplike structure was robust enough to support the nest without visually obstructing the nest itself. The basis of the early structures was then used as a foundation, with the rest of the Conservation team experimenting with the technique to create similar structures.
We developed this method further by tightly rolling the tinted and laminated tissue strips to create more three-dimensional shapes resembling twigs for some of the nests. This helped the support to visually blend more. Once the Japanese tissue twigs were prepared, they were adhered together to form the external support structure.
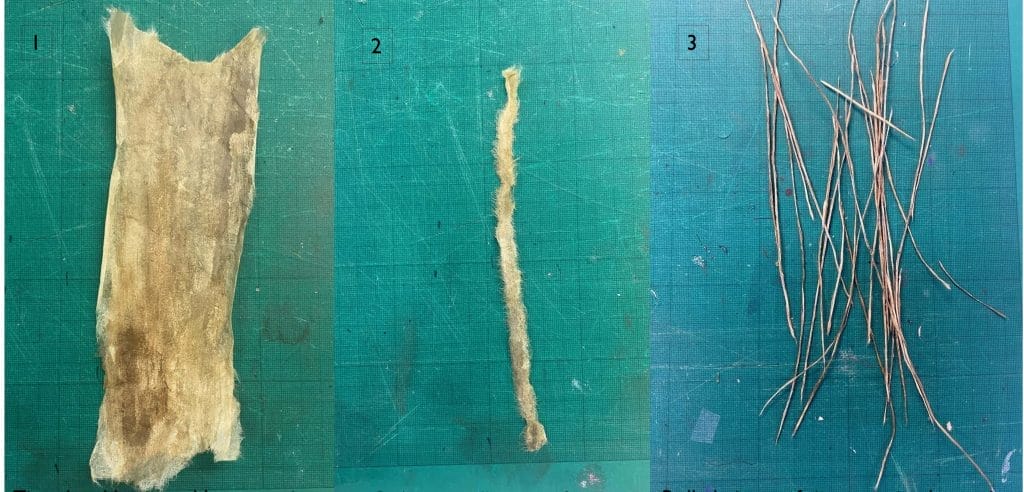
The process of creating simulated twigs to form the external cup supports for the nests.
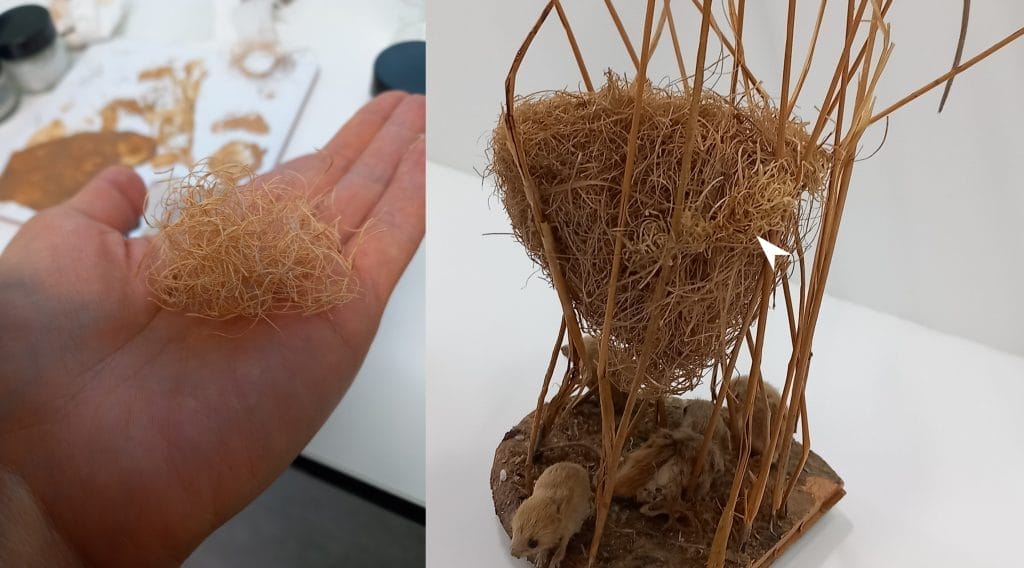
Laminated and tinted Japanese tissue shavings were created to fill structural loss of harvest mice nest
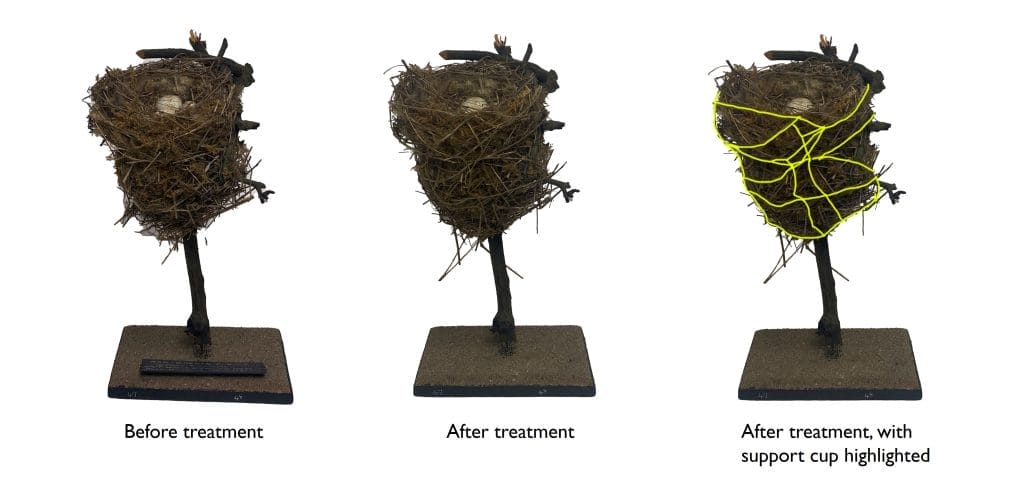
Redwing nest before and after the external cup supports was added
Attaching the support
For some nests, it was necessary to attach the cup-like support directly. This was done by applying an adhesive, or a mixture of adhesive and pulped Japanese tissue, to carefully chosen, discreet areas on the nests.
We chose to use another organic material, Klucel G, a cellulose based adhesive known for its long-term stability, to attach the external cups to the nests.
Klucel G is also considered to be a reversible adhesive, allowing the cup-like structures to be removed or adjusted in the future, if necessary. We also, as is best practice, carefully documented the process of creating the nests and where they are on the nests to guide future conservation treatments if needed.
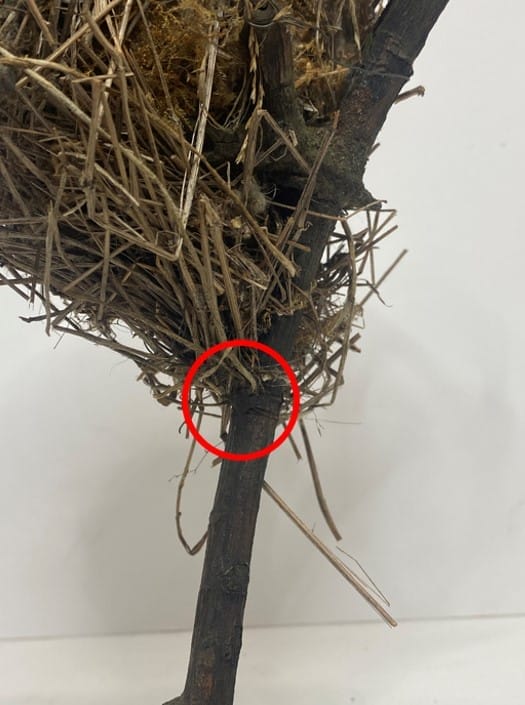
The red circle highlights an area where one of the simulated twigs was attached to the nest using pulped Japanese tissue and adhesive
After our work with the nests, they were mounted by the Exhibitions team for display.
This was a highly rewarding project, and one from which we learned a great deal, as none of us had worked on anything like this before. We hope you cannot spot the difference, but we also know the nests are much more secure now and are able to safely go on long-term display in the new gallery.
Lead image: Laura Ockel on Unsplash